While we are in the process of building a house, we are living in a finished garage on our property. Really, though, are we building a house? I think we like renovating too much! Because we built out the garage as an open apartment, we wanted to give our daughter her own space inside. This super cute playhouse works perfectly as her own “room” without a lot of extra expense. So, if you have a basement area that you want to add a little fun separate space, or if you want to give your kids their own distinct areas inside their room, you might want to try it yourself. The beauty is that you can style this in any way that you like and for any age.
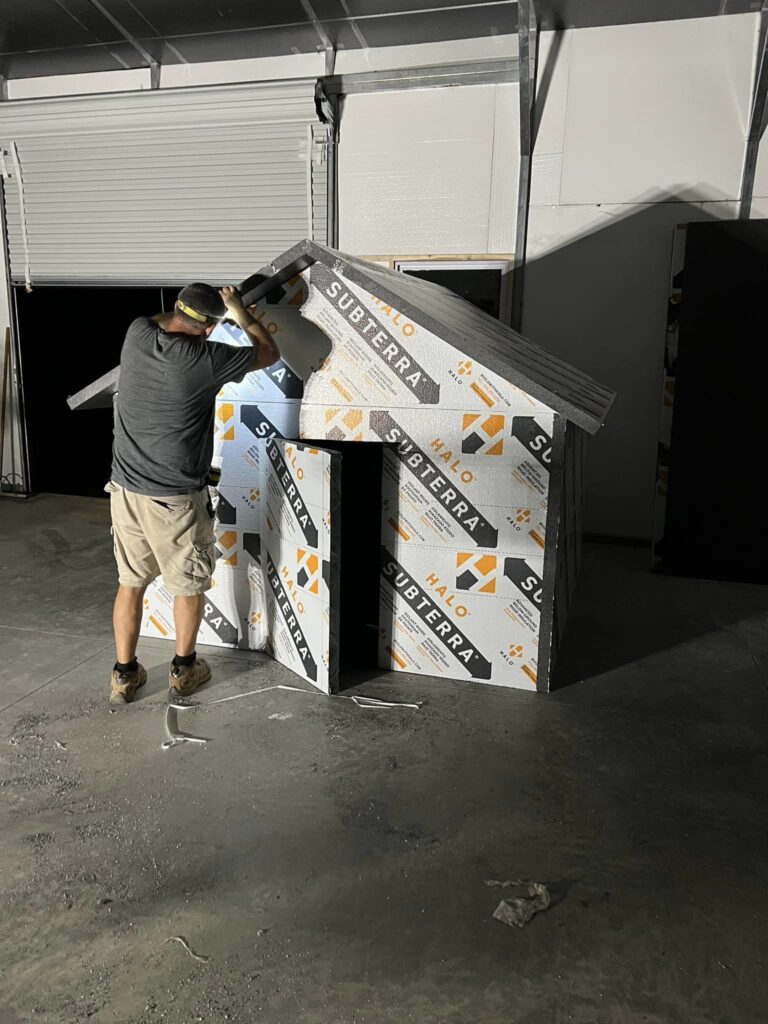
We built ours as an 8’x8′ with a 6′ pitch. We were able to get our insulation board from a discount place that sells defective pieces, but you can find these at Lowes or Home Depot as well. For our use, they were perfect. You can find everything else you need directly from Amazon.
Materials Needed:
- 4x8x2 Rigid Insulation Boards (The amount will be determined by the size you want to create.)
- 1/2″ Styrofoam Board (for the scalloped detail work. Not necessary, but you could use it for shingles as well if you want to get fancy!)
- Insulation Supports (To keep your walls together while the glue dries.)
- Liquid Nails Glue
- Paint (Again, this will be to taste. You can paint the entire house one color or be as creative as you want to be.)
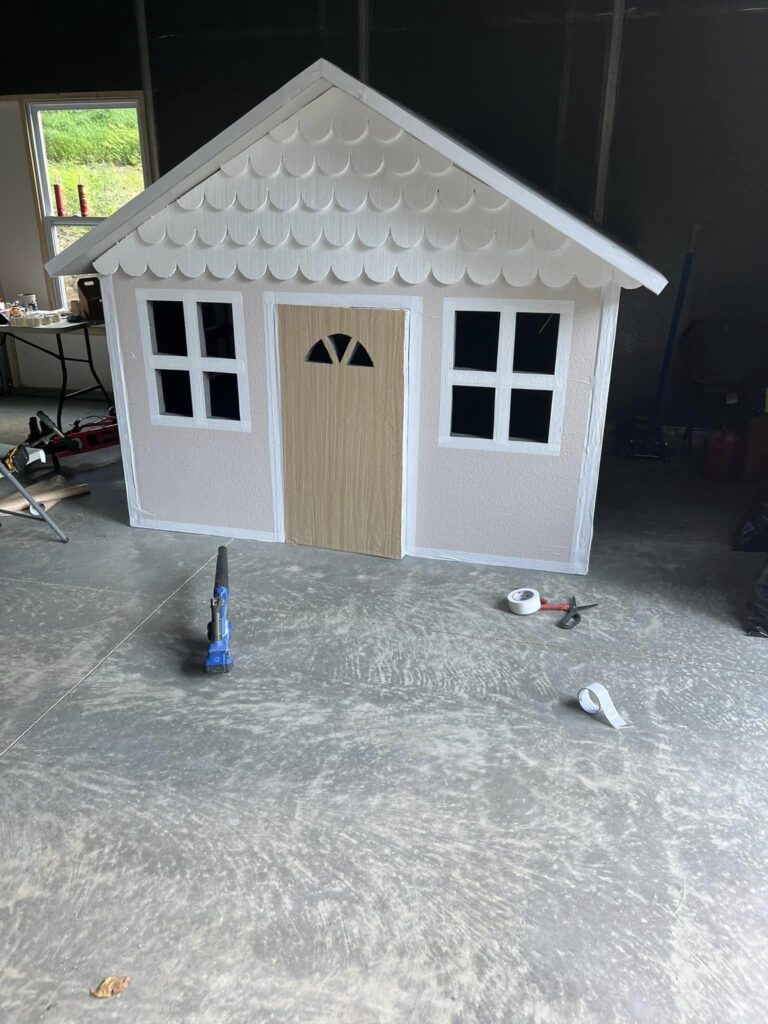
- Patterned or Single Color Contact Paper (We used a wood grain pattern for the door, shutters, and window boxes. You could always paint patterns or textures, but we found using the stick-on paper saved a lot of time and mess.)
- Duct Tape (We used white tape to create the house “trim” around the house. This not only creates a finished look, but this step also helps to add some extra stability. Choose whatever color you like based on your project.)
- Extras: Any other decorations or details you’d like to add to your finished product. (I found these cute gold stick-on polka dots to create a pattern on the inside of the playhouse.)
Insulation Supports

Heavy Duty Duct Tape

Patterned Contact Paper

500 Pack Polka Dot Stickers

Steps:
- Determine the location you plan to put your playhouse and the size that you want to build it. Because the sheets come in 8′ length, we decided to go with an 8′ square. This saved time and made the build much easier.
- Cut the pieces to fit as necessary. This includes cutting out the door as well as the pitch of your roof. Be sure to use a guide so that your angles are even. This can be as simple as using a basic protractor or as detailed as a miter guide with a miter saw.
- Attach all of your pieces together using insulation supports, but leave space for glue before pressing them together completely. We cut our supports in half and just slid them in wherever we needed to connect two pieces together. DONT FORGET! You need to attach the pieces where you plan on putting your playhouse. You won’t be able to fit an 8×8 building through a door.
- Glue all of the seams with liquid nails.
- Cut out any windows that you’d like to include. (This could be done in the first step if you already have a good plan in place. Be sure you use a level and mark your guides first so that your windows turn out evenly.)
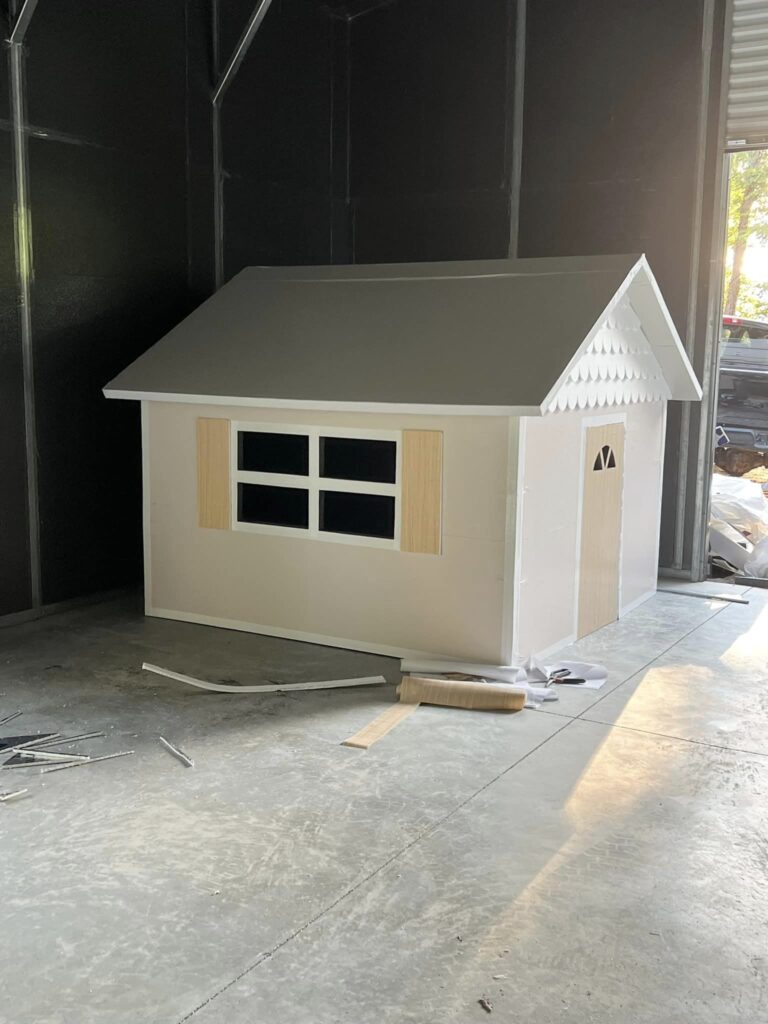
- Paint your house.
- Add your trim and details. PRO TIP: I used a roll of tape as a guide to creating my pattern for the scalloped edge detail. You could do the same thing to create shingles for your roof, or leave that part out completely.
Take a tour of the finished playhouse to get more details on the bed we built inside and decorating tips.
As always, be sure to subscribe to WreckCreational on YouTube for more DIY builds!