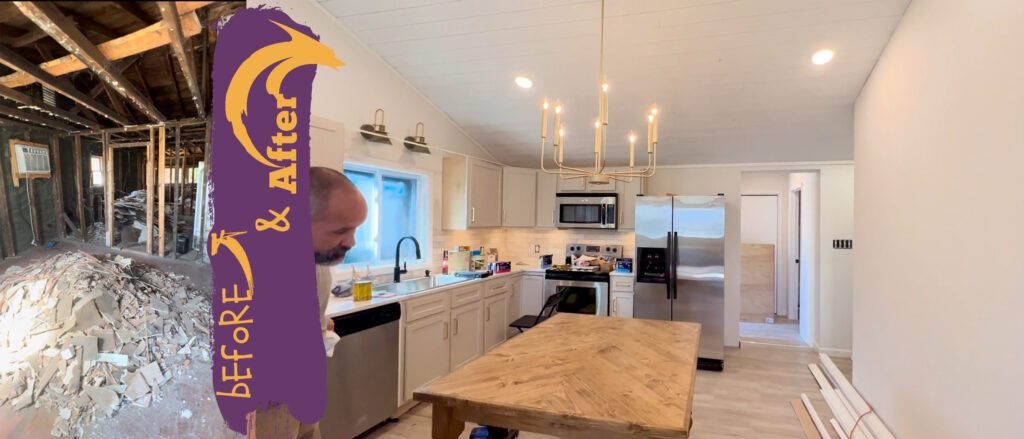
Let me tell ya’ll, this was SOME before! We had to completely gut this space, and we are still in the process of renovating it. There are really tons of elements to talk about. However, I’m just going to highlight a few in this post.
Ceiling
Instead of using drywall for the ceiling, I love to use rough shiplap. No, I’m not trying to hold onto the rustic farmhouse look. As you can see, it’s just used for the ceiling. Why? It gives a great timeless texture to the ceiling with a lot less work. We can put this up in a day whereas you would need three full days to put traditional drywall up (and make sure it’s smoothed out nicely.) This is not only helpful when you are in a hurry to get a job done, but it also covers up any natural imperfections in the ceiling while giving it a truly elevated look. So, even though you might pay a little more for the shiplap, you will end up saving considerably on labor costs, plus giving it a high-class look.
Lighting

Let’s start with that beautiful WOKNOS 8 light industrial chandelier! Yes, we have shiplap on the ceiling, but we are going for a modern, clean farmhouse look and not shabby chic. Using a chandelier in the kitchen can be a great way to add elegance and sophistication to the space. It may be difficult to see from the picture, but this ceiling has a very steep pitch making a chandelier the perfect option.
Want one for yourself? There are a few factors to consider before installing a chandelier in your kitchen.
- First, ensure that the chandelier is the right size for your kitchen. A chandelier that is too big or too small can look out of place and unbalanced. As a general rule, the chandelier should be about two-thirds the width of your kitchen island or table.
- Secondly, Consider the height of the chandelier. Make sure that it is high enough so that people won’t hit their heads on it when they are walking around the kitchen. A height of 30-36 inches above the kitchen island or table is a good rule of thumb.
- Lastly, think about the style of the chandelier. The style should match the overall design aesthetic of your kitchen. For example, if you have a modern kitchen, you may want to choose a sleek and minimalist chandelier, whereas if you have a more traditional kitchen, you may opt for a more ornate and decorative chandelier.

Recessed Lighting: While a chandelier is beautiful, you also need other light sources to bring more bright light to a kitchen. We love installing these PARMIDA LED Disk Light Surface Flush Mount lights. They last forever, and they give off a really soft, but bright white light. These are perfect for any room you want to use recessed lighting in, and they also have a dim feature. These can be installed directly into the junction box or a recessed can depending on the look you want.
Before you install recessed lighting, here are some important tips to remember:
- Plan your layout: Before you start cutting holes in your ceiling, plan out where you want to place your recessed lights. Consider the room’s layout, the function of the lighting, and the desired ambiance. Use a tape measure, pencil, and string to mark out the location of each light.
- Choose the right type of recessed lighting: There are various types of recessed lighting, including IC-rated, non-IC-rated, and airtight fixtures. Choose the type that is best suited for your ceiling and insulation.
- Follow building codes: Make sure you are following your local building codes when installing recessed lighting. For example, there may be restrictions on the distance between the fixture and insulation, or the number of fixtures you can install in a room.
- Turn off the power: Always turn off the power to the room before starting any electrical work. Use a voltage tester to confirm that the power is off.
- Cut the holes carefully: Use a hole saw to cut the holes for your recessed lighting. Make sure you are cutting in the right location, and be careful not to cut any wires or plumbing.
- Install the fixtures: Install the housing for the recessed lighting, then connect the wiring to the fixture. Use wire nuts to connect the wires, and follow the manufacturer’s instructions carefully.
- Finish the installation: Attach the trim and bulb to the fixture, then turn the power back on to the room. Test each light to make sure it is working properly.

Wall Sconces: Finally, we added another design touch with some sconces directly above the sink. These BAYCHEER conical industrial bathroom wall sconces tied together the gold from the chandelier and cabinet hardware, while also adding another soft tone to the room. You’ll notice that these are sold as individual bathroom sconces. However, don’t let that deter you from using them for other rooms. If you are unsure of whether or not you should add some sconces in your kitchen, here are some good reasons/ways to do so:
- As accent lighting: Wall sconces can be used as accent lighting to highlight specific areas of the kitchen, such as a piece of artwork, a decorative backsplash, or a unique architectural feature. They can also be used to create a warm and inviting ambiance in the space.
- In small kitchens: If you have a small kitchen with limited space for lighting fixtures, wall sconces can be a great option. They take up very little space and can be mounted on the wall at a height that is convenient for you.
- In areas where overhead lighting is not possible: If your kitchen doesn’t have a ceiling fixture or you don’t want to install one, wall sconces can be a good alternative. They can provide enough light to perform tasks such as cooking and washing dishes, without taking up too much space.
- As a decorative element: Wall sconces come in a variety of styles, from traditional to modern, and can be used to add a decorative element to your kitchen. They can also be used to complement the existing décor and add a touch of personality to the space.
Hardware

To close out this post, I just wanted to highlight these sleek, Asidrama modern cabinet pulls which are a perfect match for the chandelier and sconces I chose. The color is labeled as brushed brass but looks light a really delicate gold color. While this style and color are on trend currently, they are also classic and practical. When renovating your space, you not only want something that will be beautiful now, but you also want a look that will still be beautiful and useful throughout the years.

BONUS Furniture Piece:
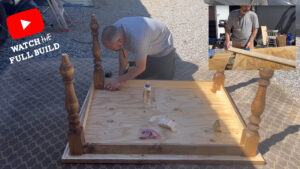
Let’s not forget that beautiful, custom-made, herringbone table! Isn’t it gorgeous? You can watch the full video of Stanley building it on the WreckCreational YouTube channel.